
Noel is back with us today, sharing her methods for cooking butternut squash. Butternut and acorn squash, as well as pumpkin, are among my favorite cold weather foods.
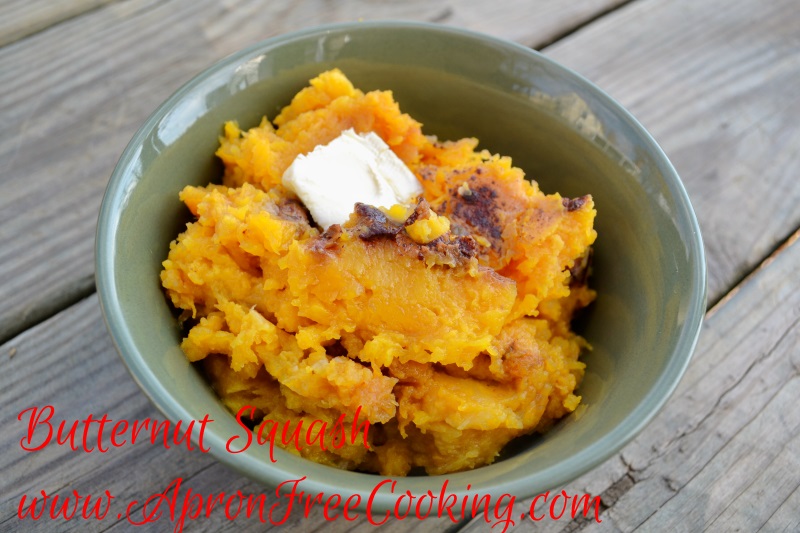
Butternut squash is quite possibly the most popular variety of winter squash, and for good reason. As its name suggests, this veggie is buttery and sweet. And, even better, it’s a nutrient powerhouse thanks to its high fiber and vitamin content, and its low calorie count.
Before you read Noel's post, here's my little trick....I add pureed pumpkin to many recipes, especially soups (even chili). The mild flavor does not alter the recipe's overall taste while packing in a good punch of extra nutrition. I also add pumpkin puree (NOT pumpkin pie filling!) to casseroles and even meat loaf/meat balls. :)
I am glad that Noel chose butternut squash to share today, as I have two nice ones from the last farmers' market ready to be cooked and served. Although I never met a potato that I didn't love, I am looking forward to some orange eating today. :)
Marcheta *Orange is the New Spud (well, not really....)
Noel Lizotte, Apron Free Cooking
My grandfather was a tremendous gardener. He was typical old time New England, in that he wanted to be as self sufficient as possible. Therefore, his garden took on near epic proportions as the years passed.
I remember walking through his garden and being amazed at the many types of squash growing in the Vermont soil. Acorn, Butternut, and Hubbard are just a few of the names I remember.
These “winter squash” are so named because they ripen in the late summer and fall, then can be stored “down cellar” through much of the winter. My grandparents cellar was a place of wonder, full of bushel baskets of squash, quarts jars of canned vegetables and garden tools waiting for spring.
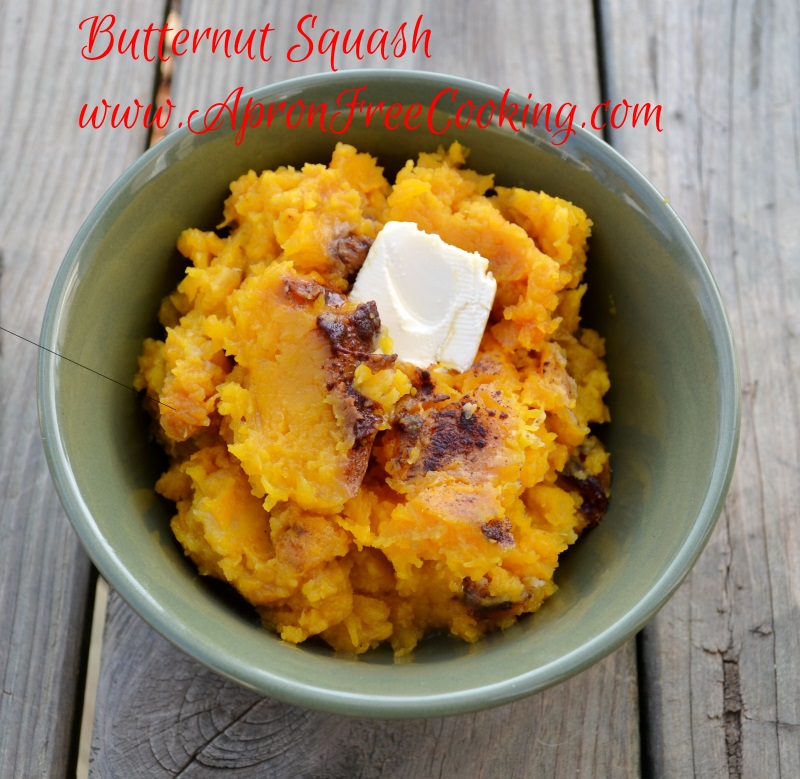
Thanksgiving dinner with my family usually features squash of some sort. As our proper New England heritage dictates, we drizzle a bit of maple syrup over our serving.
The crock pot method of preparing squash makes it easy to add to the Thanksgiving dinner without taking up valuable oven space.
For serving, you can place the squash, skin and all on a serving platter and allow guests to scoop their portion directly from the skin. Or you can scoop the squash from the skin and place in a serving bowl. Either presentation is pretty, especially when you use Grandma’s dishes!

Ingredients
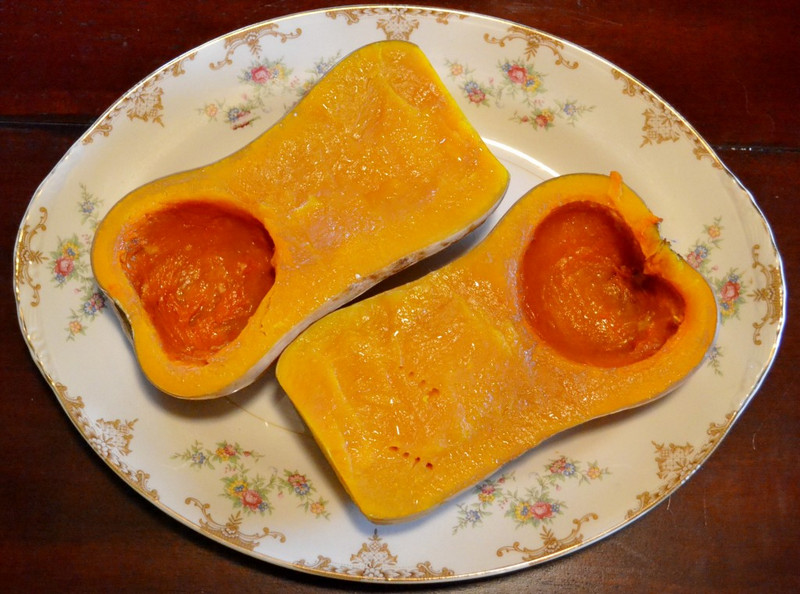
- 1 Butternut Squash
- 2 TB Cinnamon
- 2 TB Brown Sugar
- 2 TB Butter
Instructions
- Traditional Method
- Preheat oven to 350 degrees Fahrenheit. Slice the squash in half, lengthwise. Scoop the seeds and dispose of them. Sprinkle 1 TB each of cinnamon and brown sugar over each half of the squash. Place 1 TB of butter in the hollow of each half. Please in a baking dish and add an inch of water to the bottom of the pan. Cover with aluminum foil and seal tightly. Bake at 350 degrees for one hour.
- Crock Pot Method
- Slice and prepare the squash with spices as in the traditional method. Place in slow cooker or crock pot. You may stack the halves of squash on top of each other if there is only room for one half in the bottom of the crock pot. Carefully add water to the bottom of the crock pot; don't splash onto the squash. Bake on low heat 8-10 hours or high for 6-8 hours.
Notes
Approximate Nutrition Information: Servings Per Recipe: 8, Amount Per Serving: Calories: 63, Fat: 0g, Cholesterol: 0mg, Sodium: 6g, Total Carbs: 16g, Protein: 1g.
Make it a Meal: Serve with your Thanksgiving dinner. A great side dish to ham.
Variations: You can use this preparation with any winter squash.
Copyright: www.ApronFreeCooking.com


