 |
| Ava, Easter 2012 |

Sunday, March 31, 2013
Saturday, March 30, 2013
Pussy Willows and Grapevine Nests

Do you have childhood memories of pussy willows?
I do.
I don't remember finding them in the wild, or even cutting them. The pussy willows of my childhood days were already cut and ready for crafting.
The buds of male pussy willow branches are called "catkins". As an adult, I appreciate their whitish grey colors because, well, not only is it natural but when I think about it, the same color as most of our barn cats. The name seems appropriate.
In our area, pussy willows are one of the earliest "blooms" for winter-weary eyes to enjoy. But grey? C'mon. The days are still grey enough. And, think about it: the little catkins are shaped like mini-eggs, right?
Since Spring is also Easter Egg Season, we children were given pussy willow branches and colored chalk, and let loose to "pretty up" the kitten-fur soft buds. This craft is simple and old-fashioned, and nearly forgotten by me until yesterday when Jim brought in a huge bouquet of pussy willow stems that he had trimmed from his aunts house. One look at them took me right back to grade-school and colored chalk. :)
When my children were small we lived in town and had a neighbor who introduced us to another old-fashioned Easter tradition. She grew up in a large farm family during the Great Depression. With nine kids to support, her parents did not give them each an Easter basket filled with stuffed toys and candy. They came up with something even better. Their children's Easter Egg hunts were not limited to finding colored eggs, but by finding the egg nests themselves.
Katie told me that her parents made the nests by twisting up grapevines. The grapevine nests were tucked into nooks and crannies in their yard. Each nest was home to pretty hard-boiled eggs, colored with onion skins.
Katie did not have children of her own. Each year, she fashioned three grapevine nests, tucked them in nooks and crannies of my yard and put an onionskin-colored egg in each one for my children to find. I well remember the first year that she did this; Kerry was our only child at the time. Katie's eyes twinkled as she helped Kerry look for the nest that the Easter Bunny had made for to lay its egg. I don't know who was more delighted when Kerry found it, Kerry or Katie. But I do know this; Katie's thoughtfulness created a warm and lasting childhood memory for my children (and me, too!)
Katie is getting up there in years. She's a widow with no children of her own; her loving niece and nephew are the "new generation" who keep their eye on her. But, they still work, and Katie is alone most of the time.
Today, the day before Easter, I plan to take a small vase of pussy willows to Katie. Maybe we'll color the catkins with chalk to make them look more like tiny Easter eggs.
Marcheta *Wishing everyone a Happy Easter
Friday, March 29, 2013
Peaches Gone Wild
Freestone peach varieties are grafted onto hardier peach tree rootstock. A few years ago, we had such a tree freeze at the graft. The next year, branches appeared and we thought everything was going to be alright, but we had another think coming. When the peaches ripened we discovered that they were the original, clingstone type of peaches.

Those peaches were very good, but
small and, as you can imagine, hard to separate the flesh from the pit.
Believe me.
I know.
The best that we could do to eat a
fresh one was to gnaw the fruit off the stone. Now, gnawing might help rats to grow
new teeth, but it does nothing for human teeth, making those clingstone peaches
our most frustrating fruit to eat fresh.
Most of the peaches from the
reverted-back-to-its-roots tree ended up as jam because I practically had to butcher
them to get the flesh off the stones.
Yep…life was the pits
Jim was thinking of taking the tree down, but
decided to dust off an old skill learned during his career as a student at The
Ohio State University when he was working on his landscape horticulture degree.
I am talking about grafting.

Basically, grafting is cutting a slit
in a limb of a tree and slipping a cutting from another tree into it.

The cutting has to be small, with one
bud remaining.
The bark of the cutting has to be
whittled away to expose the inside.

A slit is made on the tree that the cutting is being grafted to.
 The cutting is inserted in this slip,
green touching green.
The cutting is inserted in this slip,
green touching green. 

Tape, such as black electrician’s
tape, is wrapped around the cutting to hold it in place.

The last step is to seal the entire
cutting and wound with beeswax.
Sounds simple enough, doesn’t it? Only
time will tell if Jim’s grafting work takes hold. For fun, he decided to graft
a nectarine onto a healthy peach tree, to see if he will have a peach tree with
a branch of nectarines. Oh…that Jim…ain’t he a stinker? LOL
Now, here’s what I am thinking when I
consider the Plight of the Peachtree; that tree was planted where a plum tree
had plum upped and died from some sort of smut disease. Could it be that that
particular spot in the orchard is jinxed or ~gasp~ haunted?
*cue Twilight Zone
theme song*
Marcheta *feelin' peachy
Thursday, March 28, 2013
The Brave Little Blossoms

These tiny snowdrops have been blooming their little hearts out since the end of February. They've withstood snow, rain, sleet, ice, more snow, more snow, and more snow. Yet, they do not despair; they keep on doing their thing, which is to keep me happy when I look at them from my big kitchen window. Their message is of hope and renewal and a promise that Spring will come, putting smiles on the faces of winter-weary people.
Other than snowdrops and a few crocus, my part of Ohio does not look or feel very much like Spring. As you can see in the picture of bee supers that I took when we were at Beebe's Bees yesterday, woodsy areas still have the look and feel of winter starkness. No buds on twigs, no green patches, no curious bees venturing outside their cozy homes.


Soon (I hope!) all of that will change. Twigs and trees and flowers will bud and bloom; the grass will green. Honeybees will emerge and begin another season of work as the world continues to spin around the sun.
And those snowdrops? Their early blossoming keeps them safe from honeybee intrusion. Maybe they prefer winter's stings?
Marcheta *Ain't it grand?
Wednesday, March 27, 2013
A Sweet Enterprise

We used to have an apiary. Jim wanted to expand it and went to an auction in another town held by a person who wanted to get out of the honey business. Unknown to Jim, the bees in that apiary were diseased. It did not take long for that disease to spread to all of our hives. There was only one solution: burn the bees and the supers that they called home.
For several years Jim has wanted to keep bees again and got as far as building new supers to house them, but was too busy to take it further.
Last year we met two honey vendors at the farmers markets we set up at. One is Bill Beebe (what an appropriate name!) a distributor of bee keeping supplies. The other is Bob Nelson, who is married to Sue of the maple syrup stories. Bob and Sue have a creek that runs through their property, which wild bees use as a highway during the spring. Bob successfully captures these swarms.
Now that Jim has local connections, he has become inspired to start up colonies this spring. Today we are traveling to the northern part of the county to buy supplies from Beebe's Bees, owned by Bill and his wife Kathy. We haven't seen them since the end of farmers market season last October. It'll be nice to see them and their operation.
Oh, this is funny to me. I am listening to sound tracks of old TV shows to get inspiration for another project. Just now, "Star Trek" played. What a great start to a day that will bring a new "Enterprise" to our little farm.
May the Force be with us!!!
Marcheta *honeybee trekker
P.S. I rather like Pooh's approach to space travel better, though. What do you think? :)
Tuesday, March 26, 2013
Whistle While You Work
 Yesterday we woke up to a few inches of snow which fell
overnight. It was a quiet morning, shrouded in white. Shortly after I was up, a few birds broke the
silence with their songs…songs of hope, or praise, or joy, or all of the above-
no one really knows. Birds take life as it comes and make the best of it. This
is a good lesson for us humans. Other than ski enthusiasts and owners of snow resorts,
I imagine most of us grumbled when we saw the snow. And I don’t think that
grumbling counts as song *smiles*.
Yesterday we woke up to a few inches of snow which fell
overnight. It was a quiet morning, shrouded in white. Shortly after I was up, a few birds broke the
silence with their songs…songs of hope, or praise, or joy, or all of the above-
no one really knows. Birds take life as it comes and make the best of it. This
is a good lesson for us humans. Other than ski enthusiasts and owners of snow resorts,
I imagine most of us grumbled when we saw the snow. And I don’t think that
grumbling counts as song *smiles*.
The snow, for me, was a good excuse to continue doing
nothing (which was my weekend goal, successfully achieved, I might add). I got into that mode late Saturday afternoon
after a lovely trip to Killdeer
Plains Wildlife Area to watch migrant Trumpeter swans.
The air felt warm; 42f- and the sky was filled with shades of blue that were
almost impossible to believe. Could it be that new shades of blue had been invented,
or could it be that a winter full of grey skies had caused me to forget the awesomeness
of blue skies?
 Clouds swept away those blue pigments in a hurry, by Sunday
morning the sky was prepped and ready for snow. I must admit that I like snow,
even the early Spring variety. I’ll take it over cold, dreary rain any day. But
that taste of spring on Saturday was enough of a teaser to make Monday’s snow
harder to appreciate.
Clouds swept away those blue pigments in a hurry, by Sunday
morning the sky was prepped and ready for snow. I must admit that I like snow,
even the early Spring variety. I’ll take it over cold, dreary rain any day. But
that taste of spring on Saturday was enough of a teaser to make Monday’s snow
harder to appreciate.
As I stood at a window, feeling nice and cozy inside while
taking pictures of cardinals, chickadees, woodpeckers, blue jays, and sparrows
flitting about looking for food, I changed my attitude. The birds literally “whistled
while they worked”. I realized that if
those little feathered creatures could get their jobs done on a cold, snowy day
(and in a happy manner) so could I.
I can’t whistle worth a hoot, and even my humming a happy
tune is off key, so I opted for listening to favorite songs. Somehow, music and
snow seems like a marriage made in heaven. And with the Earth dressed like a
cloud and filled with joyful noises, and no pressing work or deadlines looming
over me, Monday ended up being a bit like heaven on earth for me. And I owe it
all to a lesson learned from birds.
Monday, March 25, 2013
Easter Tradition, Deviled Eggs
Noel is taking "blogging duties" today by sharing a post from her own blog, Apron Free Cooking. Here she waxes nostalgic about her childhood Easter egg hunts and shares her recipe for Deviled Eggs.
My family, like Noel's, loves Deviled Eggs, and we have them at almost every family gathering. "Tried and True" recipes are always comforting, but I also like to try new ways to make old favorites and will use Noel's recipe the next time I make Deviled Eggs. And with several farm families near me that raise chickens, I won't be lacking for a source of eggs :)
 Following the Easter tradition of coloring hard boiled eggs and hiding them for children to find, Deviled Eggs are practically a requirement for Easter dinner.
Or, at least that’s the practice in my part of the country. When I was growing up, the Easter Egg hunt was a very big deal. We looked forward to the thrill of the hunt, for the colored hard boiled eggs and the hollow plastic eggs.
My sisters and I always hoped the plastic eggs would have a chocolate candy tucked inside. Unfortunately, the penny was the most commonly inserted item, followed closely by Jelly Beans. And those plastic eggs, with a penny tucked inside, were just not quite the treasure to a kid as the adults might have thought. At least we could use the penny in the gumball machine the next time mom took us to the grocery store.
We were less impressed by the Jelly Beans than the pennies. There are two types of candy eaters in this world, the ones who like Jelly Beans, and the ones who don’t. We fell squarely in the “don’t” camp.
As a result, the Easter Egg hunt that was held at home during those growing up years, was comprised of real, hard boiled and colored Easter Eggs. We liked hard boiled eggs, and I imagine mom figured with five kids, and a dozen eggs each, she had an Easter Sunday Dinner side dish and lunches covered for at least the next week!
In my adult experience, I’ve learned that Deviled Eggs play an important role in potlucks. Any potluck worth it’s weight in food will have at least one offering of Deviled Eggs on the appetizer table. In fact, Deviled Eggs are serious business. Families have secret recipes and it is quite an honor to be the designated Deviled Egg provider at a community potluck.
This recipe is one that evolved to tempt the picky eaters in my family. Have you ever met a child who can’t be tempted by cheese? Cheddar cheese is the secret ingredient in this recipe. You’ll find it’s a nice touch, both for the flavor and the texture.
2 TB mustard
4 TB mayonnaise
1/3 cup shredded cheddar cheese
Dash pepper

Remove eggs from pan, crack and peel shells. Slice hard boiled eggs in half, lengthwise. Remove yolks and place in small bowl. Place whites on serving dish, cup side up.
Using a fork, mash egg yolks and add remaining ingredients. Mix well. Fill each egg white cup with about 1 teaspoon of yolk filling. Divide entire filling evenly among egg cups. Sprinkle pepper over filled eggs.

Make It a Meal: Serve with Easter dinner as a side dish or as an appetizer. Take this dish to your next potluck and challenge the reigning Deviled Egg Master!
Variations: replace cheddar cheese with Mexican blend shredded cheese.
Approximate Nutritional Value: Servings Per Recipe: 6, Amount Per Serving: Calories: 138, Total Fat: 10g, Cholesterol: 222mg, Sodium: 225mg, Total Carbs: 2g, Protein: 8g.
Storage: Keeps up to three days in the refrigerator.

To download a Free PDF Copy of this recipe to your computer or for printing, click here.
Are you a Jelly Bean fan or not? Are you disappointed when no deviled eggs are present at an appetizer table?
PS: Don’t forget to share this recipe if you like it using the buttons below and follow ApronFreeCooking using the buttons in the upper right hand side of this page!
Marcheta *"egg"cited about Spring!
My family, like Noel's, loves Deviled Eggs, and we have them at almost every family gathering. "Tried and True" recipes are always comforting, but I also like to try new ways to make old favorites and will use Noel's recipe the next time I make Deviled Eggs. And with several farm families near me that raise chickens, I won't be lacking for a source of eggs :)
Following the Easter tradition of coloring hard boiled eggs and hiding them for children to find, Deviled Eggs are practically a requirement for Easter dinner.Or, at least that’s the practice in my part of the country. When I was growing up, the Easter Egg hunt was a very big deal. We looked forward to the thrill of the hunt, for the colored hard boiled eggs and the hollow plastic eggs.
My sisters and I always hoped the plastic eggs would have a chocolate candy tucked inside. Unfortunately, the penny was the most commonly inserted item, followed closely by Jelly Beans. And those plastic eggs, with a penny tucked inside, were just not quite the treasure to a kid as the adults might have thought. At least we could use the penny in the gumball machine the next time mom took us to the grocery store.
We were less impressed by the Jelly Beans than the pennies. There are two types of candy eaters in this world, the ones who like Jelly Beans, and the ones who don’t. We fell squarely in the “don’t” camp.
As a result, the Easter Egg hunt that was held at home during those growing up years, was comprised of real, hard boiled and colored Easter Eggs. We liked hard boiled eggs, and I imagine mom figured with five kids, and a dozen eggs each, she had an Easter Sunday Dinner side dish and lunches covered for at least the next week!
In my adult experience, I’ve learned that Deviled Eggs play an important role in potlucks. Any potluck worth it’s weight in food will have at least one offering of Deviled Eggs on the appetizer table. In fact, Deviled Eggs are serious business. Families have secret recipes and it is quite an honor to be the designated Deviled Egg provider at a community potluck.
This recipe is one that evolved to tempt the picky eaters in my family. Have you ever met a child who can’t be tempted by cheese? Cheddar cheese is the secret ingredient in this recipe. You’ll find it’s a nice touch, both for the flavor and the texture.
Deviled Eggs
Ingredients:
6 large eggs2 TB mustard
4 TB mayonnaise
1/3 cup shredded cheddar cheese
Dash pepper
Directions:
Place eggs in a small saucepan with enough cold water to cover. Bring to a boil over medium high heat. Cover, turn off heat and leave pan with eggs set on warm burner until completely cooled.Remove eggs from pan, crack and peel shells. Slice hard boiled eggs in half, lengthwise. Remove yolks and place in small bowl. Place whites on serving dish, cup side up.
Using a fork, mash egg yolks and add remaining ingredients. Mix well. Fill each egg white cup with about 1 teaspoon of yolk filling. Divide entire filling evenly among egg cups. Sprinkle pepper over filled eggs.
Make It a Meal: Serve with Easter dinner as a side dish or as an appetizer. Take this dish to your next potluck and challenge the reigning Deviled Egg Master!
Variations: replace cheddar cheese with Mexican blend shredded cheese.
Approximate Nutritional Value: Servings Per Recipe: 6, Amount Per Serving: Calories: 138, Total Fat: 10g, Cholesterol: 222mg, Sodium: 225mg, Total Carbs: 2g, Protein: 8g.
Storage: Keeps up to three days in the refrigerator.
To download a Free PDF Copy of this recipe to your computer or for printing, click here.
Are you a Jelly Bean fan or not? Are you disappointed when no deviled eggs are present at an appetizer table?
PS: Don’t forget to share this recipe if you like it using the buttons below and follow ApronFreeCooking using the buttons in the upper right hand side of this page!
Marcheta *"egg"cited about Spring!
Sunday, March 24, 2013
Hands to Larger Service~ Sue Rothhaar, Conclusion
It
was my cousin’s wife (and dear friend) Alita who told me about Sue Rothhaar. Alita
met Sue when she joined the church that Sue had attended since childhood, the
Pietist Church in Chatfield, Ohio.
Like
many of the members of the Pietist Church, Alita and Jim donated their time and
talents when the congregation renovated a vacant school to become their new
church. The school conversion was successful, fulfilling the needs of the
growing congregation. It is a lovely building full of modern amenities. But, as
mentioned in our last installment, the members missed the beautiful stained
glass windows that were a major part of the old church’s architecture. Sue, who
is a skilled quilter, came up with a solution that she kept secret until it was
ready to unveil.
The Solution
 |
| Sue Rothhaar stands beside one of the two quilted wall hangings that she made. Her husband, Ken, helped her draft the pattern from the stained glass windows that were an integral part of the original church building. |
With
the help of her husband Ken, who has CAD experience, Sue set out to replicate
the windows with fabrics. Ken used his
drafting skills to make a pattern from a portion of one of the old sanctuary’s
windows. Sue decided to make two identical wall hangings for a special room of
the new church and set out on shopping trips. Her mission; locate and purchase
fabric as close to in color and texture as the glass used in the original
windows. As you can imagine, this project was a huge undertaking, but Sue’s
passion kept her focused as she drew, cut, and stitched her way through
it. Sue’s choice of fabrics, coupled
with her precision sewing skills make the wall hangings true works of art. At
last, she and Ken were ready to reveal their “secret”.
The Surprise
 |
| Sunday School room at the new Pietist Church with Sue Rothhaar's quilted wall hangings that replicate the stained-glass windows from the original church. |
Sue
fondly says that some of the members of her and Ken’s
Sunday school class have been together since childhood, some have attended for
many years, and some are new members, but all of them missed the windows. The “special room” that Sue created the
stained glass wall hangings for was for this Sunday school class. Can you
imagine the classmates’ surprise when they first laid their eyes on Sue’s
handiwork? These people, who share a bond of worshipping together in the old
Pietist church, finally had their stained glass windows.
And
I am here to tell you that when you sit in one of the chairs in the large
Sunday school room, the light from a side window makes the quilted “windows”
look real.
 |
| Sue shows a picture of the round window that she replicated with fabrics. This artwork hangs in the lounge of the new Pietist Church in Chatfield. |
Hands to
Larger Service
Making
the quilted wall hangings was quite an accomplishment, but Sue is not one to
rest on her laurels. With the success of the Sunday school wall hangings behind
her, she had an idea for another gift to her church; one that could be enjoyed
by everyone. With a chuckle, Sue says
that after she “recovered” from making the big wall hangings, she set out to
replicate another window from the old church. Again, with Ken’s drafting skills
to help her, she designed and sewed a round wall hanging that featured a dove
with an olive branch. The original glass version is the top element of a larger
window from the brick church building.
This wall hanging proudly hangs in the front lounge, along with a glass
case from the brick church that houses Pietist Church heirlooms and
memorabilia.

Many
thanks to Alita, who arranged email communication between Sue and I. I
contacted Sue and we made arrangements to meet on a (very!) cold day in mid-February
at the new church building so that I could interview her and to see her
handiwork. The pictures of her quilted stained-glass wall hangings do not do
justice to the quality of Sue’s work.
Sue
is not apt to stop sewing and designing anytime soon. She continues to bless
her church with her art.
The
day that I visited the church, Sue showed me a nativity wall hanging she had
made. Sue also makes fancy western show shirts for her oldest granddaughter.
 |
| Sue Rothhaar displays a recent project, a quilted nativity wall hanging, made for her church. |
What strikes
me the most about Sue is that such a talented woman is so down-to-earth. She
has a quiet way about her that makes it easy for conversation to flow. Of her
accomplishments, Sue humbly says, “I
hope my quilts will inspire someone else to try their hand at quilting.”
I am
sure that Sue is an inspiration to many. One thing is for sure, the legacy that
she has given to the Pietist church will inspire many generations to follow,
along with the old bibles and other important church artifacts that are
carefully displayed in the glass case that was brought to the new church from
the old one.
Marcheta
*Inspired
Saturday, March 23, 2013
Head, Hands, Heart, Health...Sue Rothhaar, Part II
Sue
Rothhaar is country raised and bred. She was born in the village of New
Washington and graduated from Buckeye Central High School. Sue lovingly
describes her home life, “Art and Lola Eckstein had 3
daughters of which I am the oldest. All three of us have acquired Mom’s love of
sewing and quilting. First it was sewing for the family and now it is more
quilting. Mom has had to give up quilting (at age 93) because her hands shake
so much she pricks her fingers. So now she crochets.”
This
family’s roots are deeply entwined with the Pietist Church. The quaint brick
church stands just outside the village of Chatfield, its steeple and
stained-glass windows greeting travelers as they motor north on Rt. 4.

A
large part of rural upbringing includes joining a 4-H club.
When Sue became a 4-H member at age 10, she took this pledge:
When Sue became a 4-H member at age 10, she took this pledge:
I pledge my head
to clearer thinking,
My heart to
greater loyalty,
My hands to
larger service, and
My health to
better living,
For my club, my
community, my country and my world.
For
Sue, those are more than just words spoken from rote at the beginning of
meetings; they are principles that have remained a vital part of her life.
It was in
4-H that Sue learned to sew. Sue
stayed in 4-H until she was 18, acquiring many skills along the way.
Life by Design
Sue
became a designer at an early age. Her mother, Lola, made clothes for the family. Sue says that
there was
always a wide array
of scraps
of fabrics to spark
the imagination. Sue’s early sewing projects were doll clothes that she
fashioned from fabric left-over from her mom’s sewing projects.
After
graduation from high school, Sue went to college to become a nurse. Sue
remembers making her first quilt while in nursing school. She designed it by
tracing animal shapes from coloring books and embroidering them on 8 x10”
squares of plain fabric. This quilt was
saved until she married Ken Rothhaar and they had their first child.
Sue
says that both her mother and mother-in-law quilted all the time, and that she
often joined them in “family quilting bees” to quilt the tops that they had
stitched. By then, Sue was working in a doctor's office. Since most of her sewing time was for her children, her own quilt
was a simple one made of sewing together squares of fabrics to use as a throw
on the sofa.
When Sue retired from her nursing career, her hands did not stay idle for long; her
artistic juices led her to design art quilts. To date, she’s designed and made six large
quilts and six wall hangings. Sue says that she still makes clothes, these days
for her grandkids. Those lucky kids have all received quilted grow charts,
designed by Sue, of course.
Heart to
Greater Loyalty
 |
| Mural on one of the Sunday school rooms of the school that the Pietist Church in Chatfield converted to their new church home. |
After
the dust settled and the school had been successfully converted to a church,
Sue says “the members were amazed at what God was doing
through them for the ministry of the Pietist church”. To make the
new building look less like a school and more like their beloved brick building,
the volunteer designers used the color scheme of the interior of the old
church, and brought over some of the loose furniture.
But
still….something was missing.
The
windows.
Sue’s
designing mind went to work, and she came up with a solution and a surprise.
Tomorrow, read the Solution and the Surprise
Marcheta *keeping you in stitches
Friday, March 22, 2013
Favorite Things: Country Churches
Sue Rothhaar, The Prequel
In the beginning....
This lovely gem is the old Pietist Church in Chatfield, Ohio. As you can see, it is a tiny brick structure that is filled with stained-glass windows. The craftsmanship that went into building this church has withstood over one hundred years of cold winter winds that blow across the open fields that surround it followed by scorching hot days of summer. In its churchyard are headstones of past parishioners; remembrances of loved ones who were baptized, married, and worshipped within the shelter of stained glassed walls.
 |
| Photo by Sue Rothhaar |
Small brick buildings like churches and one-room schoolhouses dot Ohio's countryside and serve as quaint reminders of a time when life was lived on a local scale; before the era of consolidated schools, "big box" stores, and mega churches. Sadly, many of these buildings are neglected after their original purpose is no longer useful. What a shame.
Time Marches On
But, like everything, a school or church has to grow or it will die. The congregation of the Pietist church had a sudden growth spurt several years ago, so much so that they simply could not fit everyone in their beloved church home. At that time, the winds of change came calling to the local school district. Instead of small, community schools, the school board decided on building a central campus. This left another well-built landmark in Chatfield sitting empty.
Did Serendipity step in just at the time when a congregation needed a bigger building and a school district had a school to sell, or was a bigger plan already in motion? Either way, the congregation of the Pietist church bought the former Buckeye Central Elementary School to transform into their new church home. The church still owns and maintains the old building, of which I am truly thankful for because I hate it when I see Ohio's past torn down or left to rot.
Honoring the Past, Embracing the Future
 Thanks to a new generation of fine craftsmen, the new Pietist Church is a wonderful fit for the needs of modern life. Classrooms that formerly housed students now serve as Sunday school rooms. There are rooms for lounges, offices, kitchen, and the Sanctuary, of course. When the congregation moved into the newly remodeled building, the only thing missing, and missed greatly by the worshipers, were the stained-glassed windows.
Removing and re-locating the old windows was out of the question because the congregation wants to preserve their old church and keep it original.
How was the quandary solved? By needle and thread . Can you believe it? Tune in tomorrow to read about the talents of Sue Rothhaar and her Big Idea of how to bring architectural elements of the beloved brick church into the new church home.
Marcheta *seeing is believing
Thursday, March 21, 2013
Full-time Country Woman Profile, Sue Rothhaar, part 1

This picture is of Sue Rothhaar, who lives in the country near the village of Chatfield, Ohio. Why is she standing in front of a stained-glass window?
I am on a tight schedule today and don't have time to reveal the answer, as it is my mother's birthday and I'll be spending part of the day with her along with my regular "work". So, stay tuned to this blog to read Sue's story beginning tomorrow, because you will not believe your eyes when you see what she created.
*hint* we are still celebrating National Quilt Month.
Her story of love and devotion is an inspiration to us all! I guarantee it will touch your hearts.
Marcheta *amazed
Wednesday, March 20, 2013
Apple Quest

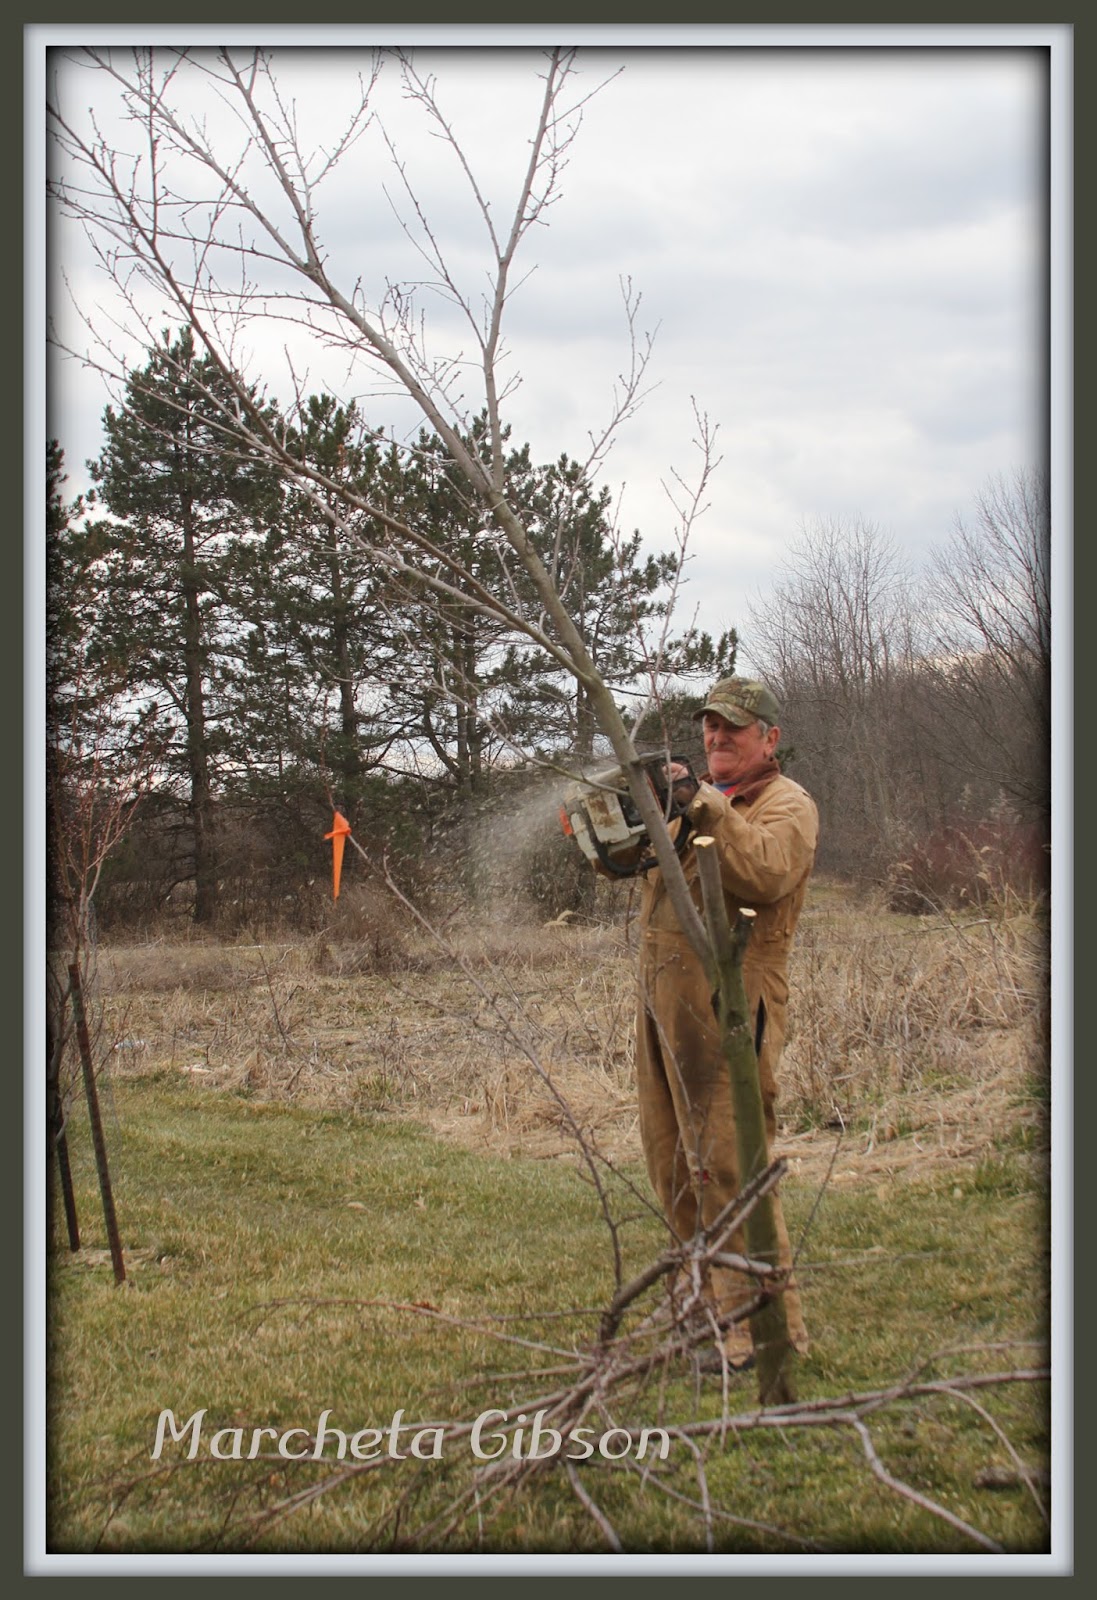
Orchard work is more than going out and picking fruit when it has magically ripen. It is a journey that has many adventures along the way, from late winter-pruning, spring blossoming, summer mowing, a few sprays here and there, and...finally...wonderful, delicious fruit. Of all farm-related work, I cannot think of any that I'd rather be doing :)
This week, Jim is taking the first steps on that journey by giving each tree a major "haircut". Last year at this time, our apple trees were budding out. This year, Jim has to bundle up in his warmest overalls when he goes out to prune the trees. Go figure.
Actually, this time of year cold weather is better than warm temps that come too early because usually a cold snap will follow and kill the young buds. For some reason, last season a freeze did not affect our budded trees and we had a bumper crop, when most orchards had very little, if any, harvest.
Today, the Spring Equinox, I have a pork roast, from Rus-Men Naturally Raised Meats in the slow cooker. My plan is serve it with mashed potatoes and the sauerkraut left over from Monday's Reuben sandwiches. I don't want to heat up the oven, so what better dessert to go with this meal than easy, microwaved baked apples?
Oh, wow! The sun, which has been fighting clouds for several days and is demanding equal time in the sky just won a battle. The sky has blue patches and the clouds are white and fluffy.
Marcheta *Energized
Microwave Baked Apples
- Core 2 apples, leaving the bottom intact.
- In a bowl, mix 2 T. brown sugar, 1 t. cinnamon and 1 t. nutmeg. Spoon the sugar mixture into the apples and set a teaspoon (or more to your taste) of butter on top of each apple. Place the apples in a deep casserole dish and cover.
- Microwave for 3 1/2 to 4 minutes or until tender. Let the apples sit for a couple minutes before serving.
Tuesday, March 19, 2013
Waxing Sentimental on a Cold Late-Winter's Day
It starts with an idea. Needles and threads and fabrics are gathered. Scissors are employed. Help is enlisted. Much love is included. The result spans generations. I'm talking about heirloom sewing. I used to limit my thinking of heirloom sewing as being special garments, such as christening gowns, bridal gowns, conformation dresses, and the like. Garments such as these are worn once in a generation and carefully packed away, waiting for another wedding, another baby, another commitment to follow the teachings of God. The seamstresses who made the garments probably knew that their handiwork would be passed down and painstakingly made sure that every stitch was perfect.
The thing is, usually when a person sets out to stitch a quilt, the thought is for immediate comfort. Whether or not the quilter is a perfectionist, the quilt is either used in the home or sent to its intended recipient. It gets washed, sometimes a lot. It gets faded. Eventually the quilt gets put away, maybe to be discovered by another generation, maybe not. I imagine that there are millions of treasure chests full of such quilts, quietly biding time with wool WWII army blankets and other has-been household linens (like embroidered pillow cases).
Gladys Clark had a different experience. Gladys already had quilts that were used for everyday when she had the idea to make a "pretty quilt to save for company". She enlisted the help of her mother, Anna Drake, who was an experienced quilter.
After 38 years of mostly being stored in a chest, their quilt still looks like new. Gladys knew that the love that she and her mom put into that quilt needed to be kept alive, so she gifted it to her niece, with instructions to use the quilt, to enjoy it, to remember that her aunt and grandmother made it.
When Gladys saw her quilt again, it brought back many memories of making it. She says that she can tell by looking at each block which ones were quilted by her mother's fine hand and which ones were quilted by her own, less experienced hands.
Gladys writes: "Here is the quilt I sent to my niece in NY. My Mom made the blocks & she & I hand quilted it in 1975. Mom had not quilted in many years, but when I ask her to teach me, she was more than willing. But-----we didn't have quilting frames. My Mom would tackle anything, so she told Ray she would tell him how to make them. Off to Gledhill Lumber he went to get the materials. We made several quilts using those frames & I still have them."
By phone, Gladys reports that her niece was thrilled with the package, and immediately put the quilt on one of the beds in her restored Victorian home. Stitched in Ohio by women who were originally from West Virginia and now gracing a bedroom in New York, Gladys' quilt has touched the hearts of three generations of women and is a true "time machine"...a true heirloom.
Marcheta *keeping sweet memories alive
 |
| Star quilt made by Gladys Clark and her mother, Anna Drake, in 1975, Galion, Ohio |
Gladys Clark had a different experience. Gladys already had quilts that were used for everyday when she had the idea to make a "pretty quilt to save for company". She enlisted the help of her mother, Anna Drake, who was an experienced quilter.
After 38 years of mostly being stored in a chest, their quilt still looks like new. Gladys knew that the love that she and her mom put into that quilt needed to be kept alive, so she gifted it to her niece, with instructions to use the quilt, to enjoy it, to remember that her aunt and grandmother made it.
When Gladys saw her quilt again, it brought back many memories of making it. She says that she can tell by looking at each block which ones were quilted by her mother's fine hand and which ones were quilted by her own, less experienced hands.
Gladys writes: "Here is the quilt I sent to my niece in NY. My Mom made the blocks & she & I hand quilted it in 1975. Mom had not quilted in many years, but when I ask her to teach me, she was more than willing. But-----we didn't have quilting frames. My Mom would tackle anything, so she told Ray she would tell him how to make them. Off to Gledhill Lumber he went to get the materials. We made several quilts using those frames & I still have them."
By phone, Gladys reports that her niece was thrilled with the package, and immediately put the quilt on one of the beds in her restored Victorian home. Stitched in Ohio by women who were originally from West Virginia and now gracing a bedroom in New York, Gladys' quilt has touched the hearts of three generations of women and is a true "time machine"...a true heirloom.
Marcheta *keeping sweet memories alive
Subscribe to:
Comments (Atom)